Quick Answer: What Happens During Backwater Valve Installation?
Professional backwater valve installation takes 6-10 hours and includes: concrete cutting to access your main drain line (1-2 hours), pipe cutting and valve installation (2-3 hours), testing and adjustment (1 hour), and concrete repair with access cover (2-3 hours). The valve is installed on your main line before it exits the house, typically in your basement floor 3-6 feet from the foundation wall. Call (647) 554-4356 for expert installation.
Key Takeaways: Installation Process
- Installation takes 6-10 hours from start to cleanup
- Valve goes on main drain line before it leaves the house
- Concrete cutting required—professional dust control essential
- Toronto plumbing permit mandatory ($176.28 in 2025)
- Cannot use basement drains during installation (4-6 hours)
- Access pit allows easy maintenance and inspection
- City inspection required for rebate and code compliance
If you're getting a backwater valve installed in your Toronto home, knowing what actually happens during the installation process can ease a lot of anxiety. This isn't a simple "drill a hole and bolt something on" job—it involves cutting into your basement floor, working with your main sewer line, and rebuilding the concrete afterward.
The good news? When done by licensed professionals like Water Pro, the process is systematic, predictable, and designed to minimize disruption to your home. Here's exactly what you can expect from start to finish.
Where Exactly Does the Valve Get Installed?
Understanding the location is crucial. A backwater valve isn't installed on individual drains—it protects your entire home by being installed on the main sanitary drain line.
The Main Line Location
Your backwater valve will be installed on the main sanitary drain line before it exits your house. In most Toronto homes, this means:
- In your basement floor - Where the main drain runs horizontally toward the foundation
- 3-6 feet from the foundation wall - Between your fixtures and where the pipe leaves
- As close to the exit point as possible - While maintaining access for maintenance
- Before any floor drains or fixtures - So the valve protects everything in your home
💡 Pro Tip: Floor Cleanout Access
Most Toronto homes built after 1980 have a floor cleanout—a round metal or plastic cap in the basement floor that provides direct access to the main drain. If your home has one, this is often the ideal spot for valve installation because the concrete is already cut. Ask your plumber about this during the site assessment—it can save 1-2 hours of work.
Why This Location Matters
The valve location is mandated by Toronto plumbing code for good reasons:
- Protects all fixtures: Sewage can't back up through any basement drain or toilet
- Proper slope maintained: The line still drains properly toward the city sewer
- Accessible for maintenance: You can reach the valve for cleaning and inspection
- Inspection compliance: City inspectors know exactly where to look
Installation Timeline: Hour by Hour
Here's what happens during a typical 6-10 hour installation for a Toronto home:
Hour 1: Setup & Prep (30-60 minutes)
Your plumber arrives with a van full of equipment: concrete saw, dust containment system, pipe cutting tools, and the backwater valve. They'll lay floor protection, set up dust barriers, and locate the exact cut point using blueprints or a drain camera if needed.
What you'll notice: Plastic sheeting everywhere, fans running, marking paint on your floor.
Hours 2-3: Concrete Cutting (1-2 hours)
Using a diamond-blade concrete saw, they cut a rectangular section of your basement floor—typically 24" x 30". Professional crews use water-cooled saws and HEPA vacuums to control dust. The cut section is carefully removed with a jackhammer or pry bar, revealing the drain pipe below.
What you'll notice: Loud noise (wear ear protection if nearby), water mist, concrete debris.
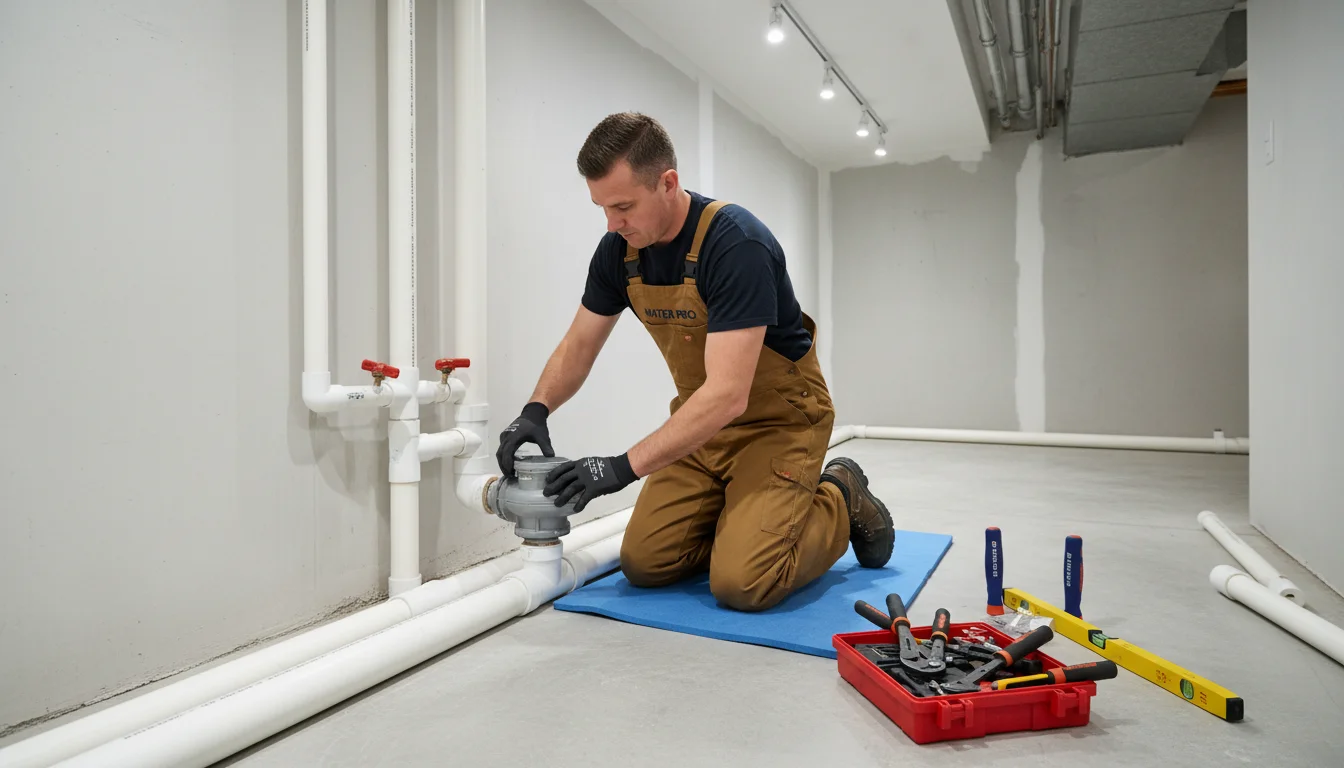
Hours 3-5: Pipe Work & Valve Installation (2-3 hours)
The existing drain pipe is measured, marked, and cut. The backwater valve is fitted with proper couplings and installed at the correct slope (typically 2% grade). All connections are sealed, tested for leaks, and the valve flap is tested for free movement. This is the most critical part—rushed work here causes problems later.
What you'll notice: Cannot use any drains during this phase. Expect 3-4 hours of zero drain usage.
Hours 5-7: Concrete Repair (2-3 hours)
Fresh concrete is mixed and poured around the valve, leaving the top accessible via a removable cover. The concrete is leveled, smoothed, and feathered to match the existing floor. A plastic or concrete access cover is set on top, flush with the floor surface.
What you'll notice: Wet concrete smell, can resume drain usage, but avoid walking on the fresh patch.
Hours 7-8: Testing & Documentation (1 hour)
The plumber runs water through the system, tests the valve's automatic closure mechanism, and verifies proper drainage. Photos are taken for permit closeout and your records. You'll receive documentation showing the valve model, installation date, and maintenance instructions.
What you'll notice: Toilets flushing, sinks running, plumber checking the access pit repeatedly.
Post-Installation: Cleanup & Curing (1 hour + 24-48 hours)
All equipment is removed, plastic sheeting cleaned up, and debris hauled away. The fresh concrete needs 24-48 hours to cure before heavy foot traffic. Light use is okay after 12 hours in most cases.
What you'll notice: Your basement looks normal again, except for a new access cover in the floor.
⚠️ Warning: What Can Go Wrong
When cutting into basement floors, surprises happen. Common issues include:
- Deteriorated cast iron pipe: Older Toronto homes may have corroded pipes that crumble when cut
- Improper slope: Existing drain line installed too flat—requires excavation to fix
- Shallow pipe depth: Pipe too close to floor surface—valve won't fit without deeper excavation
- Unexpected obstacles: Electrical conduit, water lines, or foundation footings in the way
Reputable contractors like Water Pro stop work immediately if issues arise and provide written repair quotes before continuing. Never let a plumber "just fix it" without explaining costs first. Call (647) 554-4356 for transparent quotes.
Toronto Permit Requirements
Every backwater valve installation in Toronto requires a plumbing permit from Toronto Building. Here's what that means for you:
Why a Permit Is Required
- Code compliance: Ensures installation meets Ontario Building Code requirements
- Rebate eligibility: City's $3,400 rebate requires permitted work
- Insurance validity: Some insurers deny claims for unpermitted plumbing work
- Resale protection: Documented permit shows buyers the work was done properly
Permit Process & Costs
| Permit Component | Who Does It | Cost | Timeline |
|---|---|---|---|
| Application Submission | Your licensed plumber | Included in service | Same day (online) |
| Permit Fee | Toronto Building | $176.28 (2025 rate) | Paid at application |
| Plan Review | City plumbing inspector | Included in permit fee | 1-3 business days |
| Installation Inspection | City plumbing inspector | Included in permit fee | Scheduled by plumber |
| Final Documentation | Your plumber provides copy | Included in service | Day of inspection |
💡 Pro Tip: Licensed Plumber Requirement
Only licensed plumbers can pull plumbing permits in Toronto. DIY homeowners cannot obtain permits for backwater valve installation—even if you hire a plumber to inspect your work afterward. This isn't a loophole you can exploit. The permit system requires a licensed professional from start to finish. Water Pro's Master Plumbers handle all permits as part of the installation package.
How to Prepare Your Home for Installation
A little preparation goes a long way toward a smooth installation day. Here's what homeowners should do before the plumber arrives:
Pre-Installation Checklist
Remove furniture, storage boxes, and items from the installation zone (typically 10 ft x 10 ft around the main drain). The plumber needs room for equipment and to move around safely.
Make sure you know where the main water shutoff is—the plumber may need to shut off water temporarily. Test it beforehand to confirm it works (many old shutoffs are seized).
Installation takes 6-10 hours. You don't need to hover, but someone should be home to answer questions and grant access to different areas if needed.
Budget 4-6 hours where basement drains cannot be used. Upstairs toilets and sinks may or may not be available depending on your plumbing configuration—ask your plumber in advance.
Even with dust control, fine concrete dust can travel. Cover electronics, move laundry, and close basement doors to living areas if possible.
Loud concrete cutting scares pets. Keep them upstairs or arrange for someone to take them out for the day. Open basement excavations are also dangerous for curious animals.
Step-by-Step Installation Process
Let's break down each phase in detail so you understand not just what happens, but why:
Site Assessment & Line Location
Before any cutting begins, the plumber must locate the exact position of your main drain line. This is done using:
- • Building blueprints (if available)
- • Drain camera inspection from an upstairs cleanout
- • Measuring from known reference points (foundation wall, floor drain)
- • Electronic pipe locators for hidden lines
Why this matters: Cutting in the wrong spot wastes time and money. Good plumbers measure twice, cut once.
Concrete Cutting & Removal
Once the line is located, the plumber marks a rectangular cut on your floor—typically 24 inches wide by 30 inches long. This size provides enough room to work while minimizing floor disruption.
Equipment used:
- • Diamond-blade concrete saw (wet or dry cut)
- • HEPA vacuum for dust extraction
- • Jackhammer or pry bar for slab removal
- • Wheelbarrow for debris removal
Pro crews use water-cooled saws and containment systems to minimize dust. Budget contractors skip this—you'll be cleaning fine concrete dust for weeks.
Pipe Cutting & Valve Fitting
With the drain pipe exposed, the plumber cuts out a section to make room for the backwater valve. The valve is test-fitted, adjusted for proper slope (2% grade toward the city sewer), and secured with appropriate couplings.
Critical details:
- • Valve must be installed with directional arrow pointing toward sewer
- • Flap must swing freely—no obstructions
- • All joints sealed with approved gaskets or cement
- • Valve positioned for easy future access
Testing & Verification
Before sealing everything up, the valve is tested extensively:
- • Water run through the system to verify drainage
- • Flap tested for automatic closure (plumber blocks the outflow to simulate backup)
- • All connections checked for leaks
- • Slope verified with a level to ensure proper drainage
Why this matters: A valve that doesn't close fully is worse than no valve at all—it gives you false confidence while providing zero protection.
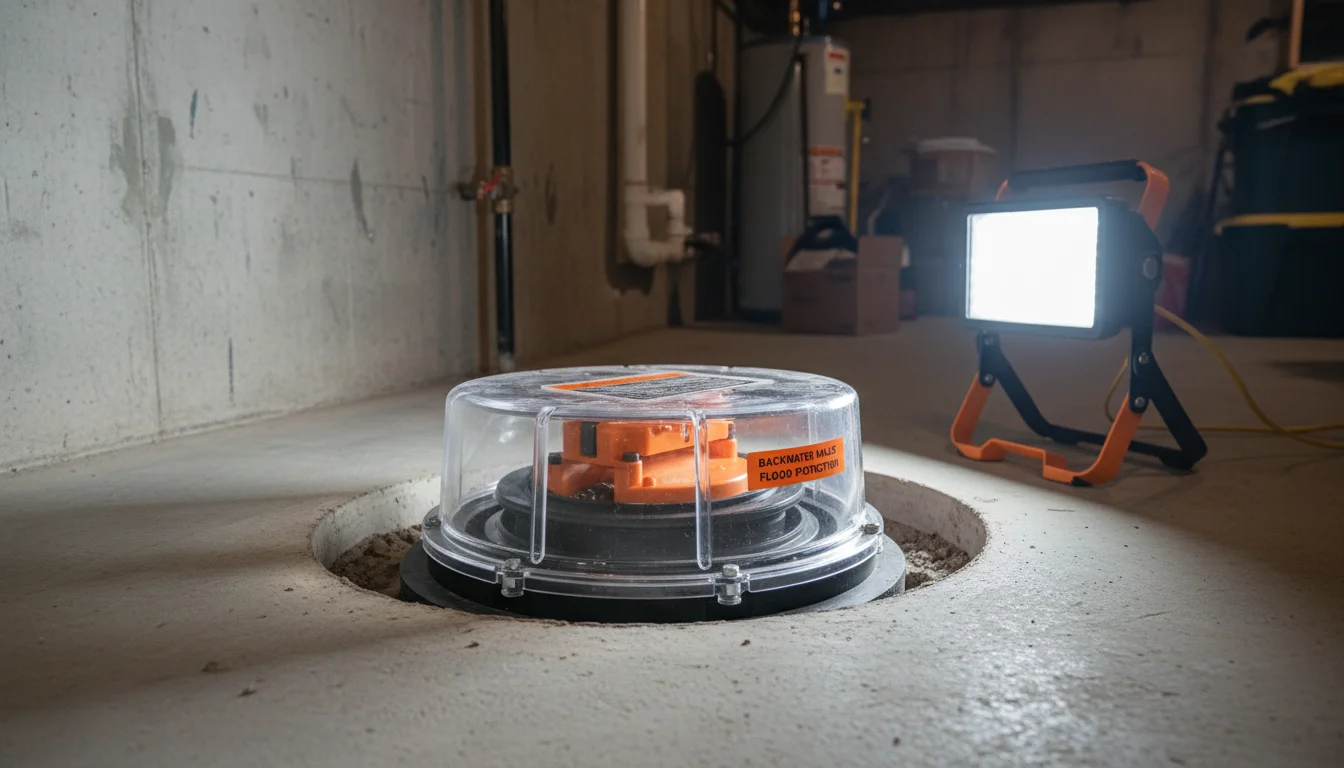
Concrete Repair & Access Pit
Fresh concrete is mixed and poured around the valve, leaving the top 6-8 inches accessible. A removable cover (plastic or concrete) is set flush with the floor surface. This access pit allows you to:
- • Inspect the valve for debris or blockages
- • Test the flap movement annually
- • Clean the sealing surface
- • Replace O-rings or gaskets if needed
The concrete is feathered to match your existing floor, but there will always be a visible seam—this is normal and unavoidable.
City Inspection
Your plumber schedules a Toronto Building inspection (usually within 1-3 business days). The inspector verifies:
- • Valve is on the main line (not a branch)
- • Installation meets code requirements (slope, connections, accessibility)
- • Valve operates correctly
- • Access cover is properly installed
Once approved, the inspector provides a final report. You'll need this for rebate applications and insurance documentation. Water Pro handles all inspection scheduling—call (647) 554-4356.
Post-Installation: What Happens Next?
Installation day is over, the inspector has signed off, and you're officially protected. Now what?
Immediate Post-Installation (24-48 Hours)
- Concrete curing: Avoid heavy foot traffic on the patch for 24 hours; full cure takes 48 hours
- Drain usage: You can immediately resume normal drain usage—no waiting period
- Access cover: Don't open it yet—let the concrete fully cure first
- Odors: Fresh concrete smells for 2-3 days; this is normal
First 30 Days
- Rebate application: Submit your City of Toronto rebate application within 180 days (don't wait!)
- Insurance notification: Notify your home insurance of the new valve (may reduce premiums)
- Documentation storage: Keep permit, inspection report, and warranty in a safe place
- First inspection: Open the access cover after 30 days and visually inspect the valve
Ongoing Maintenance
Backwater valves require minimal maintenance, but they do need periodic attention:
Annual Maintenance Schedule
Visual Inspection
Open the access cover, check for debris, verify the flap moves freely. Takes 5 minutes.
Deep Cleaning
Remove the valve, clean the sealing surfaces, check O-rings for wear, test operation. Takes 20-30 minutes.
Professional Service
Have a licensed plumber inspect, clean, and test the valve. They'll catch issues you might miss. Cost: $150-$250.
⚠️ Warning Signs: When to Call a Plumber
Contact a professional immediately if you notice:
- Slow drainage: Water drains slower than before installation
- Flap doesn't close: The backflow flap stays partially open
- Visible damage: Cracks in the valve body, broken flap, or damaged seals
- Odors from access pit: Sewage smell coming from the valve cover
- Water pooling around cover: Indicates a leak in the pipe connections
Don't ignore these signs—a malfunctioning valve provides zero protection during a storm. Water Pro offers maintenance contracts with annual inspections. Call (647) 554-4356.
Frequently Asked Questions
A backwater valve is installed on your main sanitary drain line before it exits the house, typically in your basement floor. The valve is placed between your home's plumbing fixtures and the point where your drain connects to the city sewer—usually 3-6 feet from where the line exits through the foundation wall.
Professional backwater valve installation takes 6-10 hours for most Toronto homes. This includes concrete cutting (1-2 hours), pipe work (2-3 hours), valve installation and testing (1-2 hours), and concrete repair (2-3 hours). The concrete needs 24-48 hours to cure before full use.
Yes, all backwater valve installations in Toronto require a plumbing permit from Toronto Building. The permit costs $176.28 (2025 rate). Only licensed plumbers can pull permits. The permit ensures code compliance and is mandatory for the City's $3,400 rebate eligibility.
Before installation: Clear the work area of furniture and stored items, provide access to the main shutoff valve, arrange to be home for 6-10 hours, avoid using drains during installation, and keep pets away from the work area. Your plumber will handle dust control and floor protection.
No, you cannot use basement drains during installation. Upstairs fixtures (toilets, sinks, showers) may be available depending on your plumbing configuration. Most installations require 4-6 hours of zero drain use. Plan accordingly or arrange temporary facilities if needed.
If concrete cutting reveals issues like deteriorated pipes, improper slope, or damaged connections, your plumber will stop work and provide repair options before continuing. Common issues add $500-$1,500 to the total cost. Reputable contractors like Water Pro will not proceed without your approval on additional work.
After installation, the backwater valve sits in a sealed access pit covered by a removable concrete or plastic lid. Check the valve every 6 months by lifting the lid, removing debris, and testing the flap movement. Annual professional inspection is recommended for Toronto's combined sewer areas.
The City of Toronto inspection verifies: proper valve location on the main line, correct installation depth and slope, access pit meets code requirements, valve operates freely, and all connections are watertight. The inspector provides a final report needed for rebate applications and insurance documentation.
Get Professional Installation You Can Trust
Backwater valve installation is serious plumbing work that requires expertise, proper equipment, and meticulous attention to detail. When done right, you get decades of reliable protection from sewer backup. When done wrong, you get a false sense of security and potential water damage.
Don't risk your home to save a few hundred dollars. Water Pro's licensed master plumbers have installed backwater valves in over 1,200 Toronto homes since 2000. We handle permits, inspections, rebate paperwork, and provide a 90-day workmanship guarantee.
Get Your Free Installation Quote
Licensed plumbers. Permit included. Rebate assistance. 90-day guarantee.
📞 Call (647) 554-4356Available 24/7 • Free quotes • 5,234+ Toronto families helped
Related Installation Guides
About Michael Torres
Master Plumber • Installation Specialist • 18 Years Experience
Michael has personally installed over 600 backwater valves across Toronto and the GTA. He specializes in complex basement plumbing projects and trains new plumbers on proper installation techniques. Licensed Master Plumber (#MP-7834) and member of the Plumbing Contractors Association of Toronto.
View Full Profile →